You want your stainless steel threaded pipe fittings to last. You also want them to work safely. Many people make simple mistakes when installing them. Some tighten the fittings too much. Others do not tighten them enough. This can cause leaks and damage. Some people forget to use thread sealant. Even good threads can leak without sealant. Some ignore how temperature changes affect the pipes. Careful planning helps you avoid these problems. Paying attention keeps your installation safe.
- Tightening wrong causes leaks and damage.
- Not using thread sealant makes leaks happen.
- Not thinking about temperature changes stresses fittings.
Planning
Gathering Tools
You need the right tools before you begin. Good tools help your work go well. Here are some things you need:
- Pipe wrench helps you tighten fittings.
- Teflon tape seals connections and stops leaks.
- Thread sealant works for high-pressure jobs.
- Torque wrench keeps you from tightening too much.
- Pipe cutter or hacksaw cuts pipes to the right size.
- Deburring tool or metal file smooths rough edges.
- Safety goggles and gloves protect your eyes and hands.
- Rags or paper towels clean threads and fittings.
These tools help you do the job right. A torque wrench helps you use the right force. A deburring tool makes fittings sit flat. This lowers the chance of leaks. Safety gear keeps you safe from sharp metal pieces.
Measuring Pipes
It is important to measure pipes carefully. Measure each pipe before you cut or fit it. Use a tape measure or ruler to check size. Write down your numbers so you remember them. Check your measurements again to be sure. If you cut a pipe too short, you may need a new one. If you cut it too long, it may not seal well. Careful measuring saves time and stops waste.
Project Assessment
You should look at your project before you start. Do these steps:
- Know what your project needs. Think about the fluid, layout, and place.
- Pick the right metal. Think about rust, strength, and price.
- Choose how to connect. You can use threaded, flanged, groove, or welded.
- Pick good brands and suppliers. Look for good reviews and strong support.
- Think about cost and benefits. Make sure your choices fit your budget.
Industry rules help you choose well. Here is a quick chart:
| Type of Fitting | Standard Material | Standard Dimensions |
|---|---|---|
| Wrought Fittings | ASTM A403 | ASME B16.9 |
| Forged Fittings | ASTM A182 | ASME B16.11 |
Grades like WP304/L and WP316/L work well in many plants. Following these rules helps you make safe and strong installations.
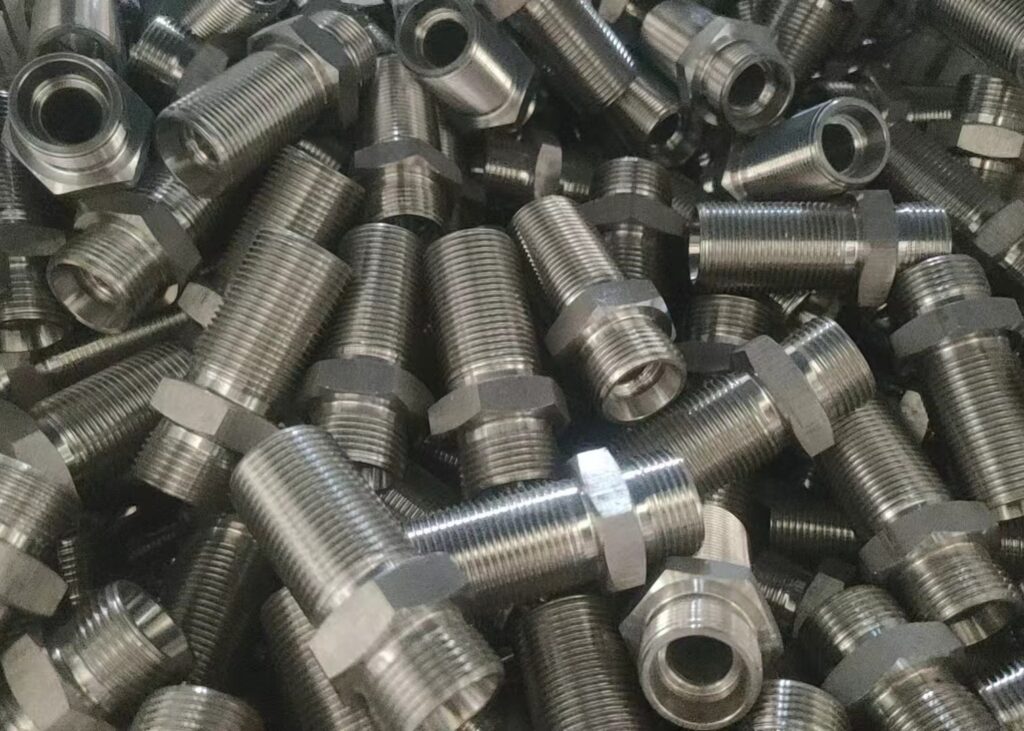
Choosing Stainless Steel Threaded Pipe Fittings
Quality Selection
You want your installation to last. Start by choosing high-quality stainless steel threaded pipe fittings. High-quality fittings resist corrosion and stand up to tough conditions. They work well in water and gas pipelines, heating systems, and even chemical plants. If you pick low-quality fittings, you may face leaks, frequent repairs, or even system failures. Take a look at the cost comparison below:
| Quality Type | Upfront Cost | Long-term Cost Implications |
|---|---|---|
| High-Quality | Higher | Long-term savings through durability and reduced maintenance |
| Low-Quality | Lower | Increased maintenance and higher overall costs due to frequent replacements and repairs |
High-quality fittings save you money over time. You avoid costly repairs and replacements. You also keep your system safe and reliable.
Compatibility Check
You need to make sure your fittings match your pipes. Check the thread specifications by referencing ANSI B1.20.1. This helps you confirm the size and shape fit together. Look at the pressure class of each fitting. The pressure class depends on the material type and thickness. Make sure your fittings meet standards from groups like ASTM, ANSI, and ISO. These checks help you avoid leaks and keep your system strong.
Tip: Always double-check compatibility before you start installation. This simple step prevents problems later.
Inspecting for Damage
Before you install stainless steel threaded pipe fittings, inspect them closely. Look for dents, kinks, or signs of corrosion. Check the threads for wear or bent ends. Damaged threads can cause leaks. Clean the fittings and threads with a small brush or cloth. Remove dirt, grease, or debris. After cutting a pipe, clean and deburr the edges. This keeps the threads in good shape and helps you get a tight seal.
- Inspect for visible damage like dents or corrosion.
- Check threads for wear or bent ends.
- Clean fittings and threads before installation.
- Deburr pipe edges after cutting.
Careful inspection helps you avoid leaks and keeps your system working well.
Preparing Threads
Cleaning and Deburring
You need to prepare your pipe threads before you install fittings. Clean and deburr the ends to make sure you get a tight seal. Follow these steps for best results:
- Cut the pipe square. Use a pipe cutter or saw to make a straight edge.
- Clean the pipe. Wipe away dirt, grease, and metal shavings with a rag.
- Ream or deburr the edges. Use a deburring tool or metal file to smooth out rough spots and remove filings.
- Check the diameter. Make sure the pipe returns to its original size after deburring.
- Get the pipe ready for joining. Inspect the threads and make sure they look clean and sharp.
Tip: Clean threads help you avoid leaks and make fittings easier to tighten.
Thread Direction
You must pay attention to the direction of the threads. Most stainless steel threaded pipe fittings use right-hand threads. Turn the fitting clockwise to tighten. Always match the direction of the fitting and the pipe. If you force the fitting in the wrong direction, you can damage the threads. Damaged threads lead to leaks and weak connections.
Note: Before you start, check the thread direction on both the pipe and the fitting. This simple step helps you avoid cross-threading.
Anti-Seize Compound
You should use an anti-seize compound when working with stainless steel threaded pipe fittings. These compounds, often made with nickel or copper, act as a barrier between surfaces. They reduce friction and heat, which helps prevent galling. Galling happens when metal threads stick together and tear. This can ruin your fitting and pipe.
- Anti-seize compounds protect against galling, even at high temperatures.
- Products like SAF-T-EZE® Stainless Steel Anti-Seize work up to 2500ºF (1370ºC).
- H-P Stainless Steel™ Anti-Seize Compound resists chemicals and works well with hard metal alloys.
Apply a thin layer of anti-seize to the threads before you connect the fitting. This step keeps your installation smooth and safe.
Applying Sealant
Teflon Tape or Thread Sealant
You need to choose the right sealant for your stainless steel threaded pipe fittings. Teflon tape and liquid thread sealant are the most common options. Each has strengths and weaknesses. The table below shows how they compare:
| Feature | Teflon Tape | Liquid Thread Sealant |
|---|---|---|
| Application | Clean, easy to use, effective for small pipes | Better for straight threads, fills gaps |
| Pressure Use | Immediate full pressure use | Requires curing period (typically 4 hours) |
| Disassembly | Easier to disassemble | Creates a glue-like bond, harder to disassemble |
| Reliability for Larger Pipes | Often less reliable for larger sizes | More reliable for larger sizes |
| Torque Requirement | Standard torque for sealing | May require slightly greater torque for sealing |
Teflon tape works well for small pipes and quick jobs. Liquid thread sealant gives better results for larger pipes and high-pressure systems. You should pick the sealant that matches your project needs.
Correct Application
You must apply sealant the right way to prevent leaks. Follow these steps for a leak-free connection:
- Clean both male and female threads. Remove dirt and burs.
- Apply the sealant only to the male threads. Do not cover the end of the pipe.
- Wrap Teflon tape clockwise, following the thread direction. Use two to three wraps for standard tape. For thicker tape, use fewer wraps.
- Tighten the fitting by hand until it feels snug.
- Use a wrench to finish tightening. Stop at the wrench-tight engagement point. For shaped fittings, turn past finger tightness as needed for proper orientation.
Tip: Always wrap tape in the same direction as the threads. This keeps the tape from unraveling when you tighten the fitting.
Common mistakes can cause leaks or damage. Avoid these errors:
- Using the wrong sealant for stainless steel threaded pipe fittings.
- Over-tightening the joint. This can warp the fitting and lead to leaks.
- Overwrapping the pipe thread. Too much tape can wedge between threads.
- Wrapping tape on the female threads. This weakens the joint.
- Ignoring tape thickness. Adjust the number of wraps for different tapes.
You can prevent leaks and keep your system strong by following these steps and avoiding mistakes.
Installation Steps
Aligning Fittings
Proper alignment keeps your pipe system strong and leak-free. If you rush this step, you may cause leaks or stress on the pipes. Follow these steps to align your fittings:
- Mark the Pipes: Use a marker or tape to show where you want to install the fittings. This helps you keep everything in the right place.
- Dry Fit the Fittings: Before you use any sealant, put the fittings together without tightening. Check if the pipes line up. Adjust if needed.
- Apply Thread Sealant: Put a thin layer of sealant on the male threads. This helps stop leaks.
- Tighten the Fittings: Use a pipe wrench to tighten the fittings. Do not use too much force.
- Check the Alignment Again: After tightening, look at the pipes. Make sure they still line up with your marks.
Tip: Always check the orientation of elbows and tees before you finish tightening. This keeps your system neat and easy to maintain.
Tightening Techniques
You need to tighten your fittings the right way. Too much force can damage the threads. Too little force can cause leaks. Here are some tips to help you:
- Follow Torque Specifications: Check the manufacturer’s instructions for the right torque. This keeps the fitting safe and stops leaks.
- Clean and Inspect: Make sure all parts are clean. Look for damage before you start.
- Hand-Tighten First: Start by turning the fitting by hand. This helps you feel if the threads are going in smoothly.
- Use a Wrench for Final Tightening: After hand-tightening, use a wrench to finish. Do not go past the recommended torque.
- Test for Leaks: After tightening, check for leaks. If you see any, adjust the fitting as needed.
Note: Hand-tightening helps you avoid cross-threading. Using a wrench only for the final turns prevents over-tightening.
Avoiding Cross-Threading
Cross-threading can ruin your pipe and fitting. It happens when the threads do not match up and cut into each other. You can prevent this with a few simple steps:
- Use thread sealant or specialty seal tape. This helps the threads slide together and prevents galling.
- Always start threading by hand. If you feel resistance, stop and check the alignment.
- Do not overtighten. Too much force can push the threads out of place.
- Apply anti-seize lubricant to the threads. This makes it easier to tighten and loosen the fitting later.
- Choose the right materials and use proper installation techniques. This keeps your connections strong and reliable.
Tip: Take your time when starting the threads. If you rush, you may cross-thread and damage your stainless steel threaded pipe fittings.
Leak Testing and Inspection
Soap Solution Test
You need to check for leaks after installing your fittings. The soap solution test is a simple way to do this. Mix a small amount of dish soap with water in a spray bottle. Spray the solution onto the joints and threaded connections. Watch closely for bubbles. If you see bubbles forming, you have a leak.
Advantages of the soap and water method:
- You do not need special training.
- Bubbles show leaks clearly.
- The materials are cheap and easy to find.
- The test does not harm your pipes.
Drawbacks of the soap and water method:
- You may miss very tiny leaks.
- The solution might not reach every joint.
- Hard-to-reach spots can make detection difficult.
Tip: Always test every joint, even if you think the installation went well. Bubbles mean you need to tighten or reseal the fitting.
Final Checks
You should complete a final inspection before you finish your project. Use a checklist to make sure everything meets quality standards.
- Count the fittings and compare with your order.
- Look at the packaging to see if it protected the fittings.
- Read the labels and markings to confirm they are correct.
- Measure the fittings to check if they match your specifications.
- Review material certificates for chemical and mechanical properties.
- Inspect each fitting for visible defects.
- Perform mechanical tests if needed.
Note: Careful inspection helps you avoid problems later. You can catch mistakes before they cause leaks or damage.
Regular Inspection
You need to inspect your system regularly to keep it safe and working well. The frequency depends on how much you use your system. The table below shows how often you should check your fittings:
| System Usage | Recommended Inspection Frequency |
|---|---|
| High-use systems | Monthly or Quarterly |
| Less active systems | At least Biannually |
Regular inspection helps you find wear, corrosion, or leaks early. You can fix small problems before they become big ones. Always look for signs of moisture, rust, or loose fittings. If you find a leak, repeat the soap solution test and repair the joint.
Tip: Keep a record of your inspections. Write down the date and what you checked. This helps you track changes over time and plan maintenance.
You can keep your stainless steel threaded pipe fittings working safely by testing for leaks, checking your work, and inspecting regularly.
You can keep stainless steel threaded pipe fittings safe and working well by doing these things: First, make sure the material and size match. Next, clean the threads and get them ready. Then, pick the right sealant and tighten the fittings slowly and carefully. After that, check for leaks and look at the fittings often.
Stainless steel fittings last a long time and do not need much fixing. If you inspect them often, you can stop leaks, rust, and expensive repairs.
| Consequence | Description |
|---|---|
| Leaks | Stops work and can break things |
| Corrosion | Makes fittings wear out faster and break |
| Costly Repairs | Makes fixing things cost more money |
Be careful and follow these steps to help your fittings work well for a long time.
FAQ
What sealant works best for stainless steel threaded pipe fittings?
You can use Teflon tape or liquid thread sealant. Teflon tape works well for small jobs. Liquid sealant gives better results for larger pipes. Always check the product label for compatibility with stainless steel.
How do you prevent leaks in threaded pipe fittings?
You should clean the threads, apply the right sealant, and tighten the fittings to the correct torque. Test for leaks using a soap solution after installation. Regular inspection helps you catch problems early.
Tip: Always wrap Teflon tape in the same direction as the threads.
Can you reuse stainless steel threaded pipe fittings?
You can reuse fittings if the threads look clean and undamaged. Inspect for wear or corrosion before reinstalling. Replace any fitting that shows signs of damage to avoid leaks.
What causes cross-threading and how do you avoid it?
Cross-threading happens when you misalign the threads. Start threading by hand and check the alignment. If you feel resistance, stop and realign. Use anti-seize compound to help threads slide smoothly.
| Problem | Solution |
|---|---|
| Cross-threading | Hand-tighten first |
| Galling | Use anti-seize |